
A great way to build, test, and test your website in a secure and cost-effective setting is to use Laragon to install WordPress on your localhost. By doing this, you can work on themes, plugins, or custom features without worrying about a live site going down. This is ideal for both seasoned developers working on complex projects and beginners learning WordPress.
With the help of Laragon, a powerful and user-friendly development tool, we will demonstrate how to install WordPress on localhost in this tutorial. Laragon makes setup easy, allowing you to quickly and effectively create a local environment. You will have a local WordPress website ready for all your development needs by the end of this course.
Useful Resources
Before you begin, make sure you have access to these tools:
- Download Laragon – Local development environment.
- Get WordPress – Download latest version of WordPress.
Why Choose Laragon for Install WordPress on Localhost?
Laragon is a lightweight and flexible tool that makes it easy to set up a local environment for web development (e.g., Install WordPress on localhost and create a website without a domain or hosting plan). Its purpose is to save developers from having to worry about complex setup so they can focus on project design and testing.

Advantages of Laragon:
- Super-fast & easy setup process.
- Automatic configured virtual hosts.
- Pre-packaged tools for PHP, MySQL, and Apache (Latest Version).
- Ideal for WordPress, Laravel, and other frameworks.
Step-by-Step Guide to Install WordPress Using Laragon
Step 1: Download and Install Laragon
- Visit the Laragon official website and download the specific software as per your system requirements.
- Install Laragon by following the on-screen instructions.
- Once Largon is installed in your system, open Laragon and click “Start All” to activate its services.


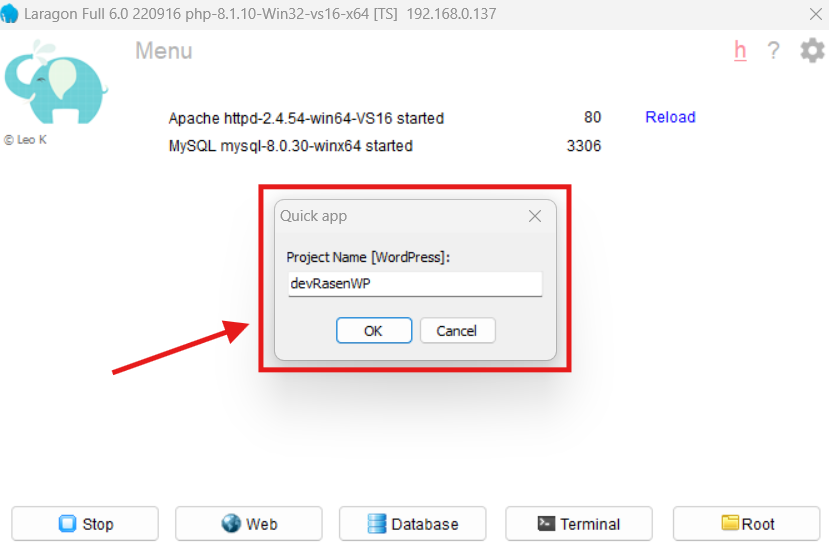
Step 2: Set Up a New WordPress Project
- In the Laragon control panel, go to Menu > Quick App > WordPress.
- Enter a name for your project (e.g.,
devRasenWP) and click on the Ok button. - Now sit back, Laragon will automatically download the latest WordPress files, create a project folder, and set up a database.
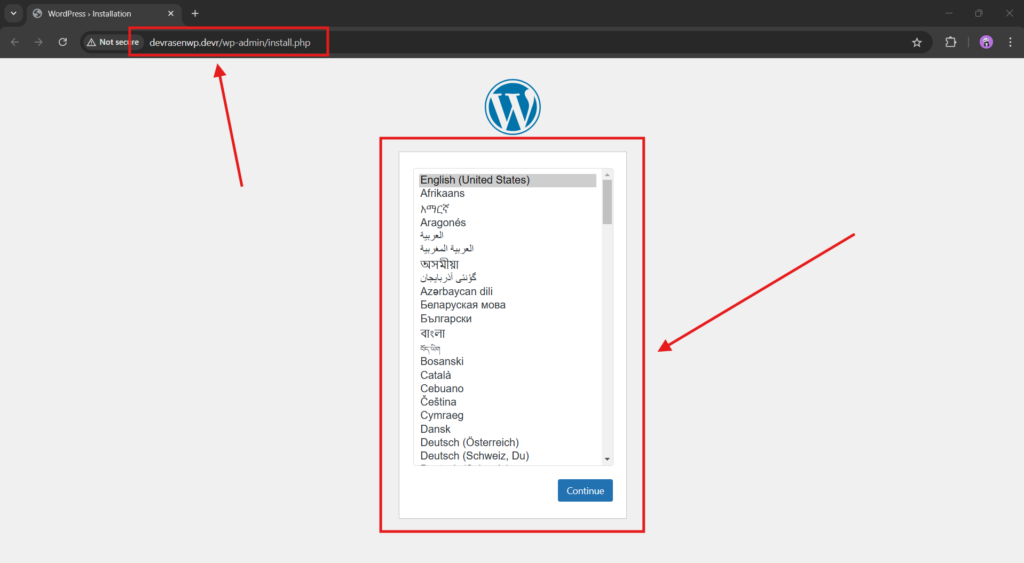
Step 3: Install WordPress on Localhost
- Open your browser and navigate to your project URL (e.g.,
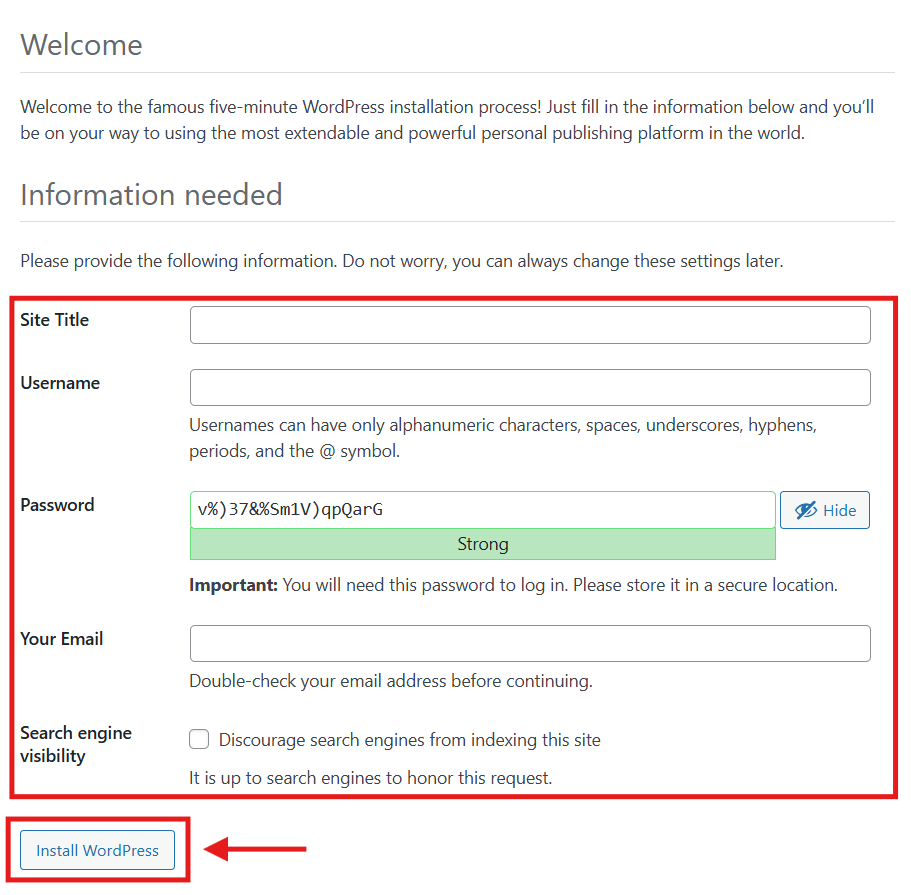
http://devRasenWP.test). - Complete the WordPress setup wizard:
- Choose your preferred language.
- Enter database details (Automatically pre-filled by Laragon).
- Set up your site title, admin username, password , and other details.
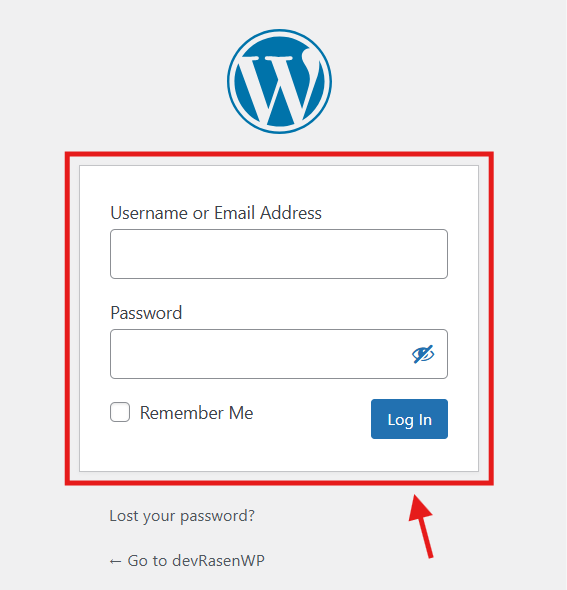
Step 4: Access Your WordPress Dashboard
- After installation, visit
http://devRasenWP.test/wp-admin. - Log in with the credentials you just created.
- You now have a fully functional WordPress site on your localhost!
Benefits of Install WordPress on Localhost
There are several advantages to using localhost for WordPress development:
- Cost-effective: During development, no hosting fees are required.
- Safe environment: Test features, plugins, and themes without compromising live websites.
- Faster workflow: Make adjustments and resolve issues as quickly as possible.
Important Learnings
After completing this lesson, you now know how to:
- Explore your WordPress dashboard after logging in.
- Establish Laragon for regional growth.
- Create a WordPress project and set it up.
Conclusion
Laragon streamlines the process of building a native WordPress website, making it effective for experienced developers and accessible to beginners alike. Whether you’re testing plugins and themes or building a new website, Laragon guarantees a seamless and hassle-free experience.