
Website security is crucial in today’s digital environment. Data loss, financial loss, and reputational damage are just some of the catastrophic consequences that can result from a single breach. A powerful security plugin like Wordfence can help with this. A well-known WordPress security plugin, Wordfence offers a full range of capabilities to protect your website from hackers, viruses, and other threats. We’ll walk you through the Install and Setup Wordfence Security step-by-step in this guide.

Why Use Wordfence Security?
With features like a powerful firewall, malware detection, and real-time threat defense, Wordfence is a powerful security plugin for WordPress. It supports websites of all sizes and security requirements, with both free and commercial versions.
Step 1: Install & Setup Wordfence Security Plugin
- Log in and access your WordPress dashboard.
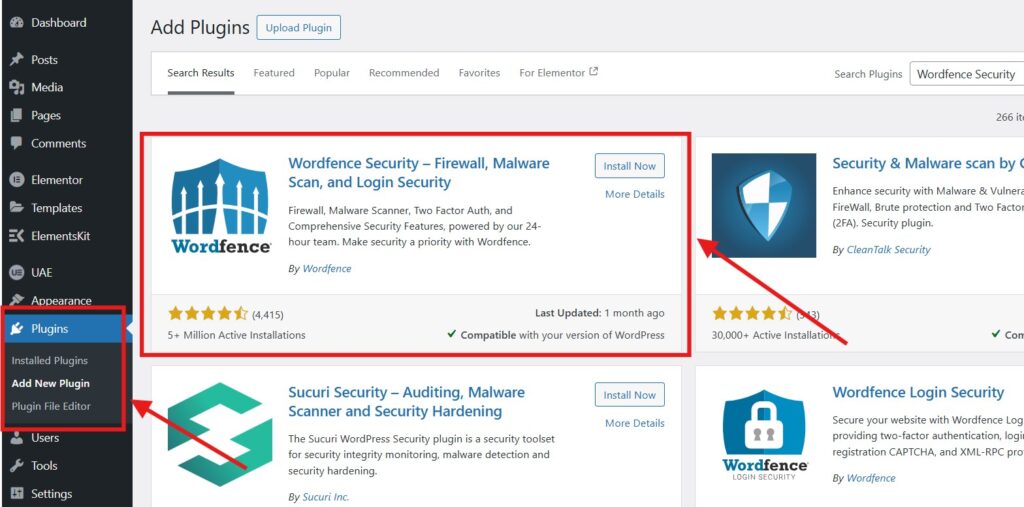
- Navigate to the Plugins menu on the left and select Add New.
- Type “Wordfence Security“ in the search bar.
- Click the Install Now button when the Wordfence plugin appears.
- Click Activate to activate Wordfence after installing it on your website.
Step 2: Initial Setup of Wordfence Security
1) View Wordfence Settings:
- Upon activation, a new menu option will appear in the left sidebar called Wordfence.
2) Account Activation:
- When you first access Wordfence, you will be asked to provide your email address for security alerts. By taking this step, you can ensure that you are aware of any threats.
- Click Continue after checking the box to accept the Wordfence terms.

3) Premium Offer:
- You will be presented with the choice to upgrade to Wordfence Premium. If you are using the free version, you can ignore this for now.
Step 3: Configure Basic Firewall Settings
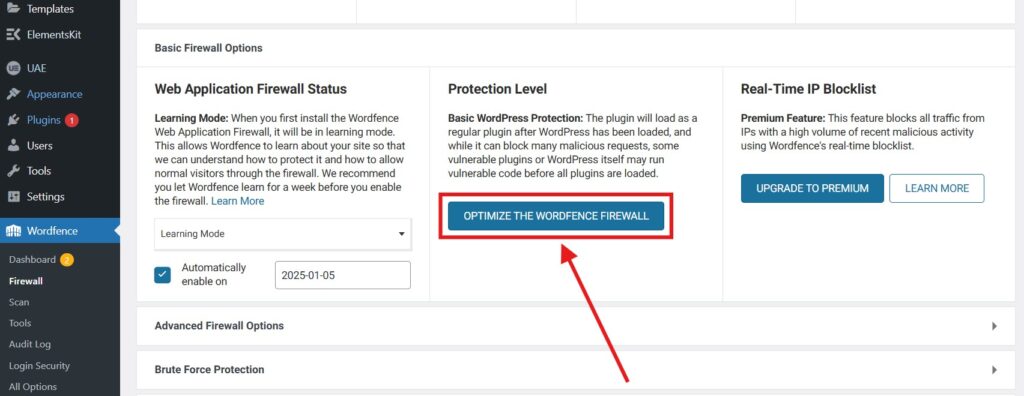
1) Enable & Optimize the Firewall: To enable the firewall, first go to Wordfence > Firewall and click on “All Firewall Options” option**.** Then under Protection Level, click on “Optimize the Wordfence Firewall”. Follow the instructions provided.
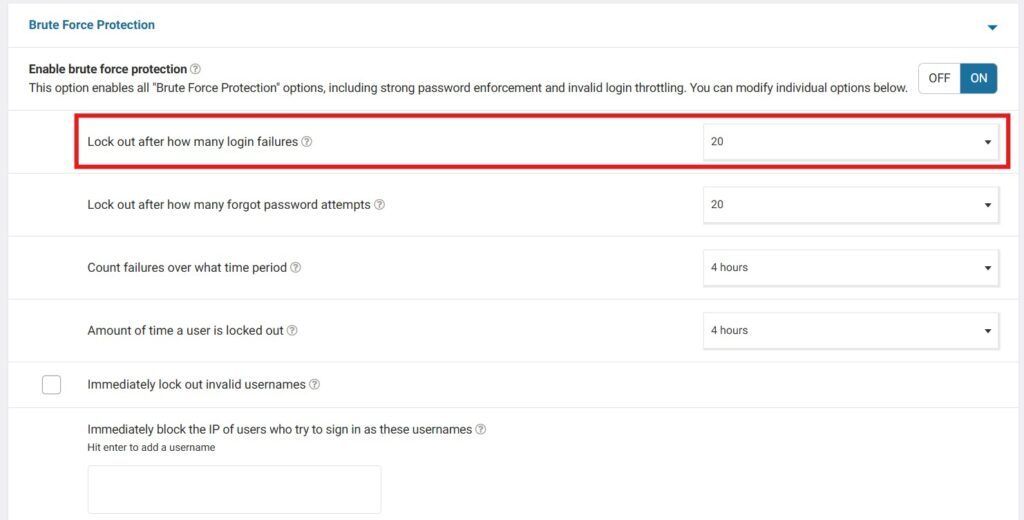
2) Set Firewall Rules: To set Firewall rules, navigate to Enable brute force protection and other options. Here you can either use the default settings or change them to suit your needs. For example, you can limit login attempts or block specific countries.
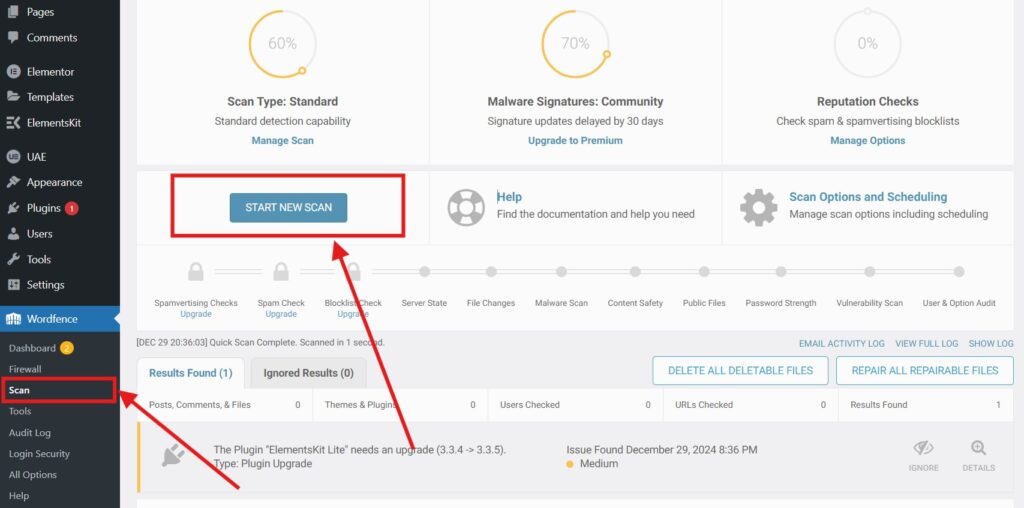
Step 4: Run an Initial Scan
- Start a Scan:
- In order to initiate a scan, first select Wordfence > Scan and then select Start New Scan.
- The plugin will look for vulnerabilities, out-of-date plugins, and malware.
- Review Results:
- After the scan is finished, go over the results and take the suggested actions to address any problems.
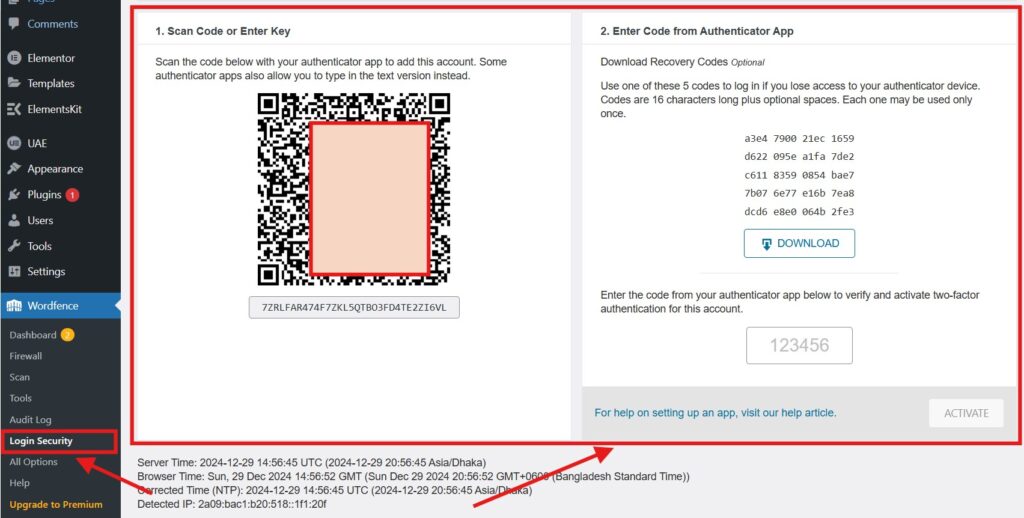
Step 5: Configure Login Security
- Enable Two-Factor Authentication (2FA):
- Open Wordfence > Login Security to enable two-factor authentication (2FA)**.
- Set Up reCAPTCHA:
- If you want to stop bots from trying to log in, set up Google reCAPTCHA.
Step 6: Monitor Your Site
- Enable Alerts:
- First, make sure email alerts are enabled under Wordfence > All Options. To prevent being overloaded with alerts, adjust the alert settings.
- Review Live Traffic:
- This function helps you detect suspicious activity on your website by displaying activity in real time.
Optional: Upgrade to Wordfence Premium
While the free version offers excellent protection, Consider upgrading to the Wordfence Premium plan for advanced features such as real-time IP reputation checks, malware removal assistance, and more. To upgrade:
- Firstly, select Wordfence > Upgrade to Premium.
- Comply with the activation and payment guidelines.
Final Thoughts
The most important step you can take to secure your WordPress website is to install and configure Wordfence security. Update your WordPress core, plugins, and themes frequently to maximize Wordfence’s performance. Wordfence is your trusted partner for website security, whether you’re using the free or paid version.
Get peace of mind knowing your online presence is safe by starting to secure your website now!