


The process to create a subdomain on Hostinger is easy and improves the structure and operation of your website. Subdomains are ideal for separating distinct areas of your website, such as a blog, commerce, or support section. You can easily create a subdomain on Hostinger by following this guide, which will walk you through the entire process step by step.
What Is a Subdomain?
You can host distinct material from your main website by using a subdomain, which is an extension of your principal domain. For instance:
- Main domain:
example.com - Subdomain:
blog.example.comorsupport.wix.com

Subdomains simplify the structure of your website and are helpful for content organization and project launches without the need to purchase additional domains.
Benefits of Using Subdomains
- Content Segmentation: Maintain separate categories of content, such as online stores, blogs, and forums.
- SEO Optimization: Target specific keywords for each subdomain to increase search engine rankings.
- Easy Management: Manage each subdomain as an independent entity without affecting the primary domain.
Step-by-Step Guide to Create a Subdomain in Hostinger
Follow these steps to create a subdomain in Hostinger:
Step 1: Log In to Your Hostinger Account
- Visit Hostinger’s website and log in to your account.
- Navigate to the hPanel dashboard.
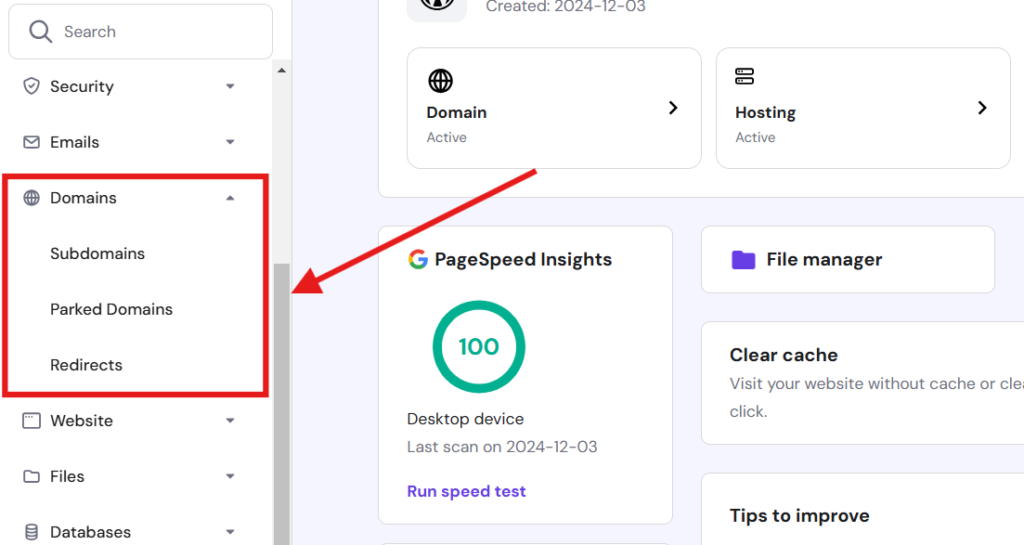
Step 2: Access the Subdomains Section
- In hPanel, find the Websites section, here you will see all the hosting plans with list.
- Click the Dashboard option of specific domain, which you want to use to create the subdomain.
- Click Domains > Subdomains to access the Create Subdomain page from the left-hand menu.

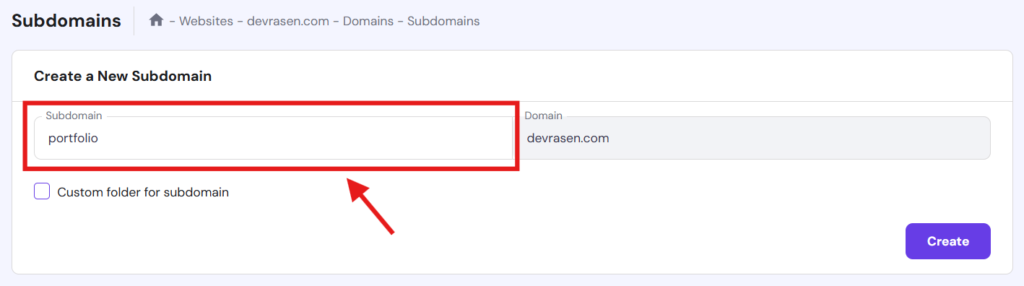
Step 3: Enter Subdomain Details (Create a Subdomain)
- Subdomain Name: Type the desired subdomain name (e.g., “blog” or “portfolio”).
- Document Root: Hostinger automatically fills this field, indicating where files for the subdomain will be stored. You can customize this path if necessary.
Step 4: Create a Subdomain
- Click the Create button to finalize the process.
- Hostinger will take a few moments to set up your subdomain.
- Once created, you’ll see your subdomain listed in the Subdomains section.
- Test the subdomain by entering it into your browser’s address bar.

Customizing Your Subdomain
After creating the subdomain, you can:
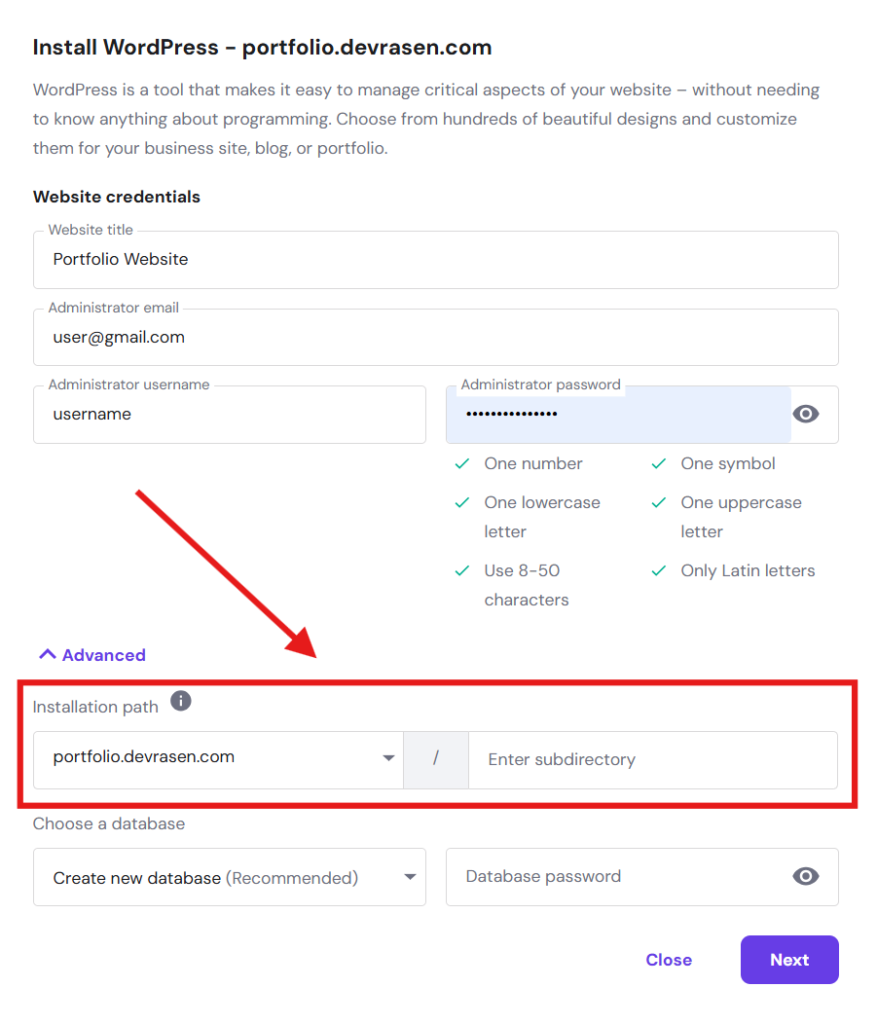
- Install Application: To add a CMS platform like WordPress, use Hostinger’s auto-installer.
- Upload Content: Upload files to the subdomain’s document root using a file manager or FTP.
- Set-up SSL: To improve security and SEO, secure your subdomain with an SSL certificate.
Conclusion
A simple and easy way to increase the functionality of your website is to create a subdomain on Hostinger. Setting up and maintaining subdomains for a variety of uses, including blogs, commerce, or specialized content categories, is easy if you follow these step-by-step instructions. Make the most of subdomains to increase your online visibility, streamline operations, and improve user experience.
Need more help or have questions? Leave a comment below with your thoughts!


